The Gradient Tool Should Not Exist
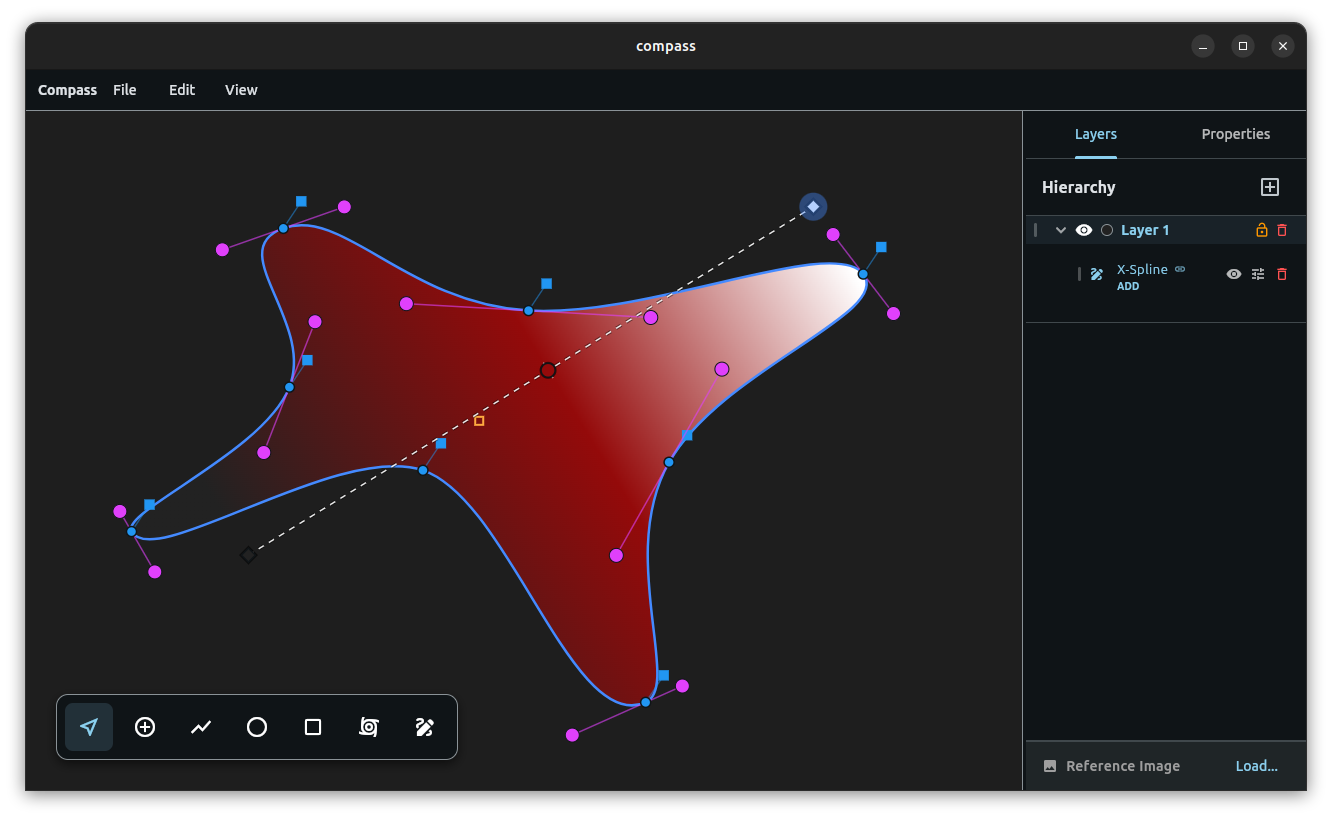
Compass has reached a major milestone. It now supports direct Linear Gradients and fully editable Gradient Meshes, but the important part is not simply that Compass has gradients. Illustrator has gradients. Inkscape has gradients. Every serious vector application has gradients.
The difference is that Compass does not need a Gradient Tool.
The Toolbar Is a Physical Metaphor
Most graphic design software is organized like a physical toolbox. You choose the Selection Tool, then the Pen Tool, then the Rotation Tool, and finally the Gradient Tool. Each function is represented as a separate instrument that must be picked up before the software allows you to perform a particular kind of edit.
This approach made sense when graphical interfaces were still teaching people how to understand computers. A toolbar resembled a box of physical tools, and every icon represented an object with one clear purpose. You selected the tool, performed the action, and then put it down by choosing something else.
But software is not a physical workspace. There is no actual Gradient Tool. There is only a shape that can have a gradient, and the separation between the shape and the tool used to edit it is largely artificial.
The Shape Already Knows What It Is
In Illustrator, applying a gradient and editing a gradient are treated as separate operations. You assign the fill through one part of the interface, select a dedicated tool to expose its controls, and then move between the canvas, toolbar, color panel, gradient panel, and swatches to adjust the result. The artwork gradually disappears beneath the interface required to operate it.
Inkscape follows much of the same model. The controls may be arranged differently, but the underlying assumption remains that gradients belong to a specialized mode.
Compass breaks with that assumption. Every shape can carry a gradient at any time, and the gradient does not need to be activated through a separate global tool because it already belongs to the selected shape.
Right-click the shape and choose Make Gradient. The controls appear directly on the canvas. That is the entire transition.
A Linear Gradient Appears Where It Exists
When a Linear Gradient is applied, Compass places its controls directly over the artwork. The first point establishes one end of the gradient, the second establishes the other, and the line connecting them becomes the gradient axis.
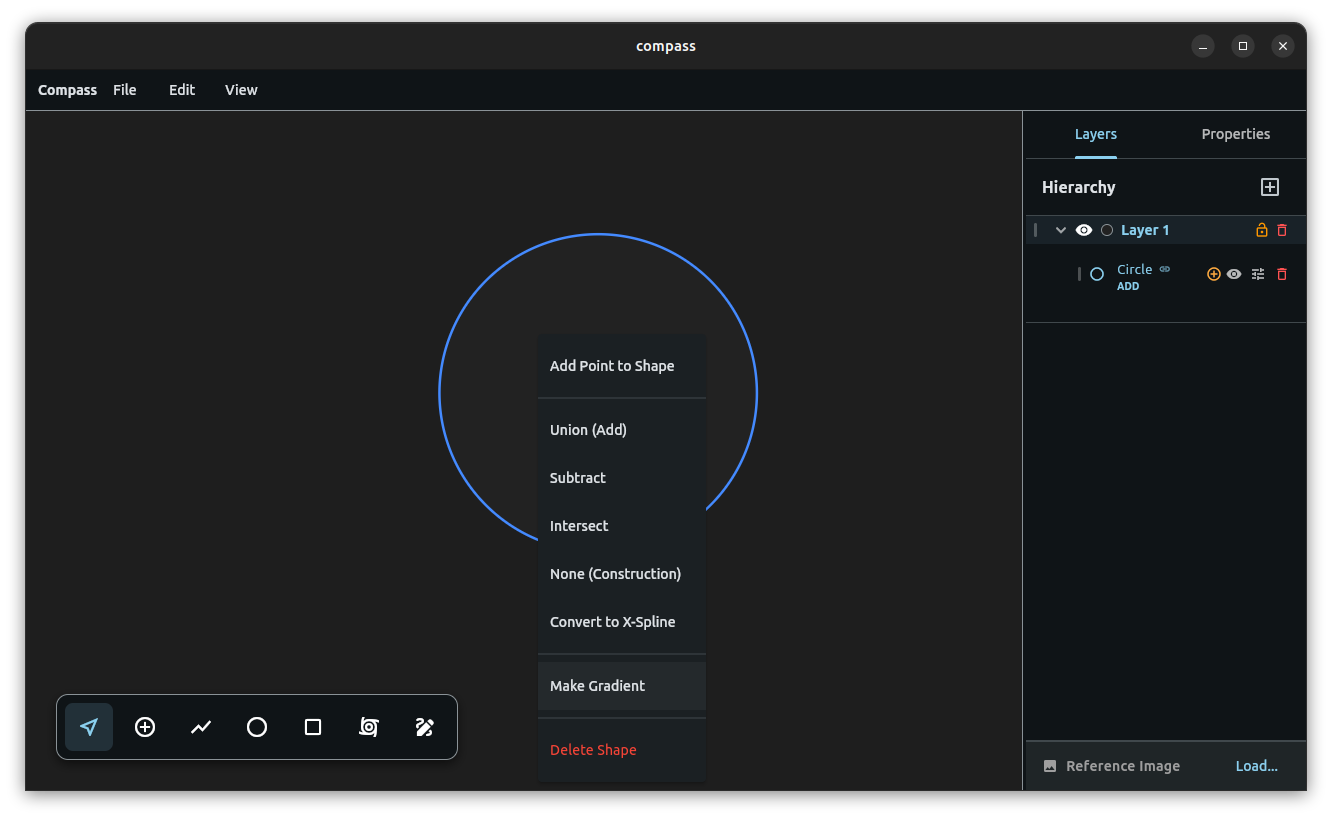
A Linear Gradient applied directly to a shape without changing tools or entering a separate editing mode.
Dragging either endpoint changes the gradient immediately. The endpoints can move freely because they define the direction, length, and position of the gradient itself. The gradient is not adjusted through a miniature representation in a panel. It is adjusted where it exists.
Additional colors are inserted directly between the endpoints. Right-click the on-screen gradient guide and add another stop. The new stop appears exactly where you clicked and samples the color already visible at that position, preserving the current appearance of the gradient.
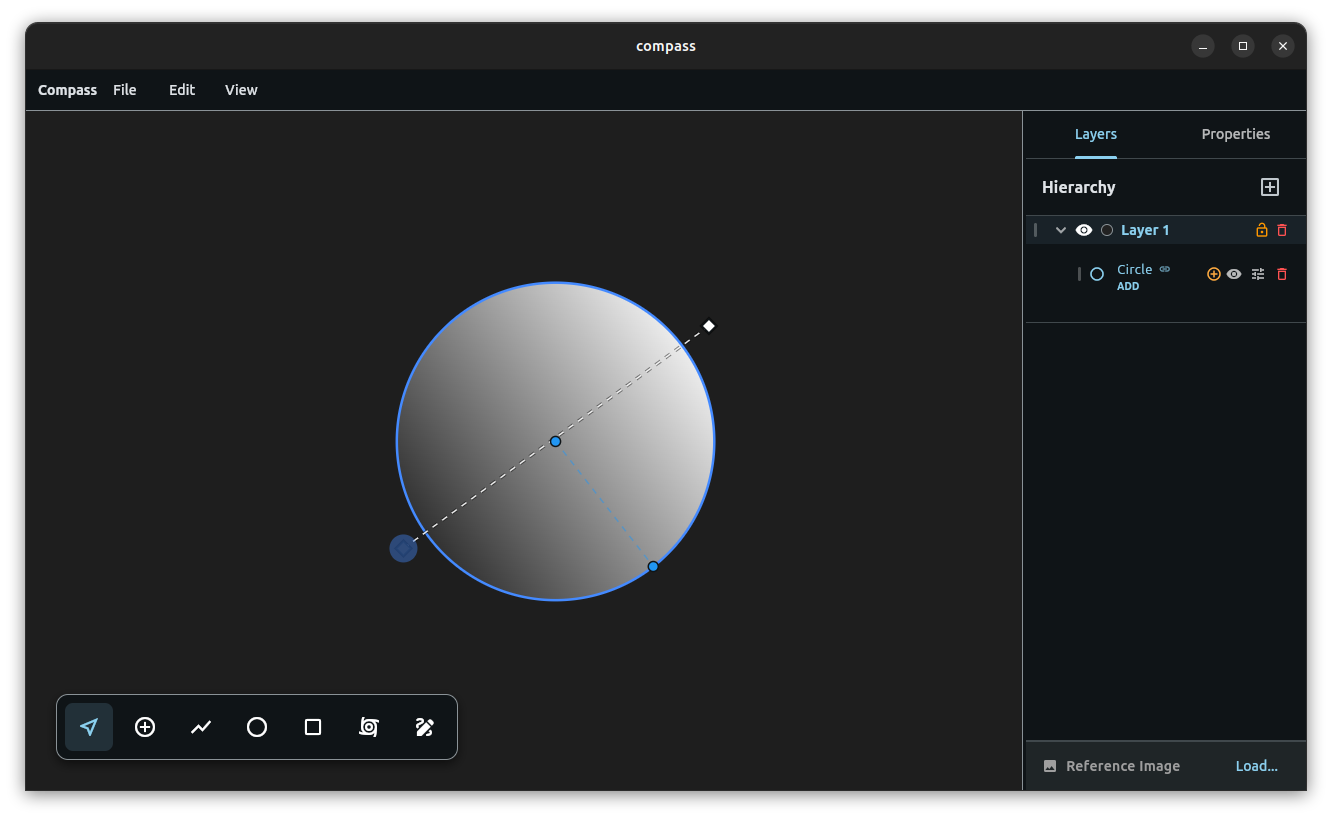
Interior color stops slide directly between the two gradient endpoints.
From there, the stop can be assigned a new color and moved along the axis. The interaction remains visible because the relationship itself is visible. There is no abstract slider representing something happening somewhere else. The artwork is the editor.
Endpoints Define, Interior Stops Refine
The first and final stops have a different responsibility from the colors placed between them. The endpoints define the gradient. Moving them rotates, stretches, repositions, or reverses the axis. The interior stops refine the transition inside that structure.
Because interior stops belong to the gradient axis, Compass constrains them to slide between the endpoints instead of allowing them to drift freely away from the relationship they control.
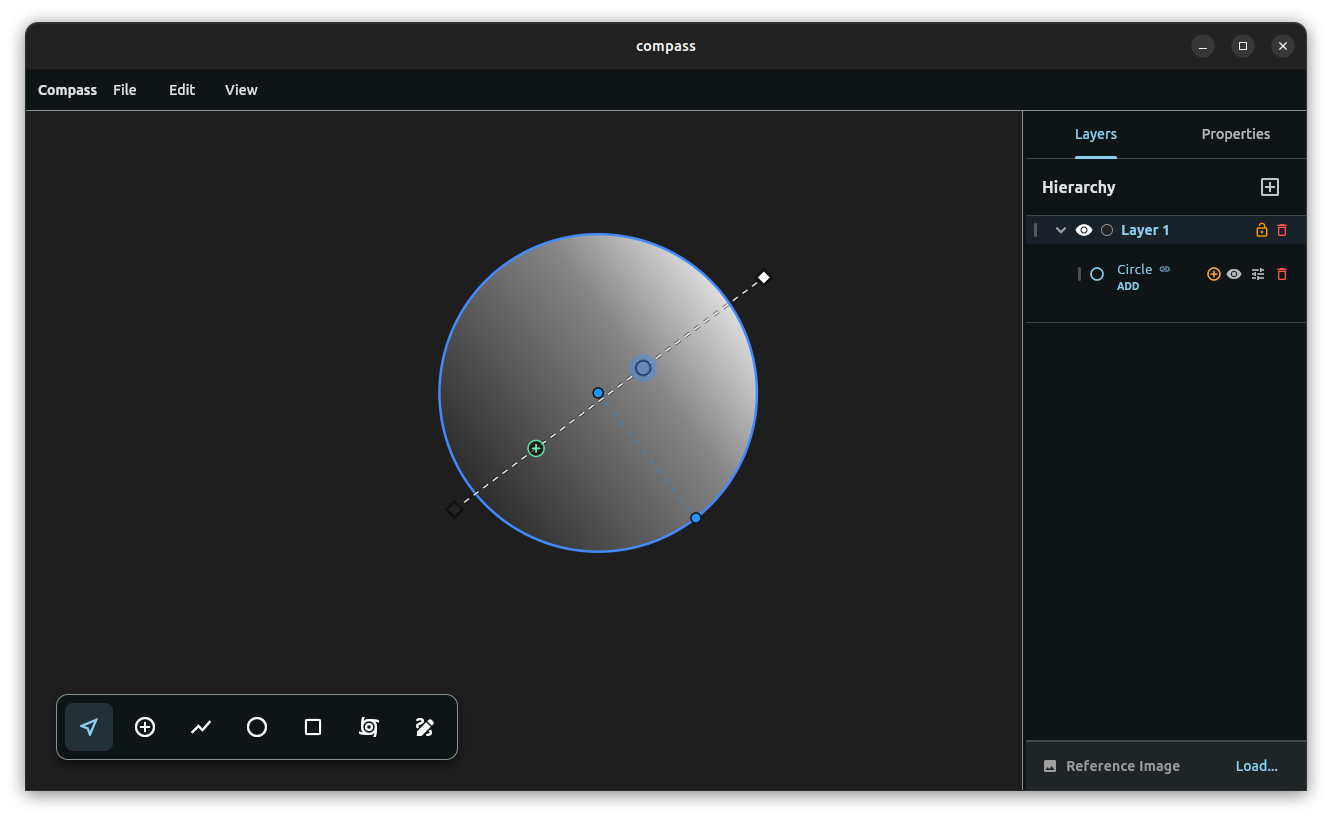
The endpoints define the gradient geometry while interior stops remain constrained between them.
This difference is also communicated through the controls. The endpoints appear as diamonds, while the interior colors appear as circular sliders. You do not need to open a panel to understand which kind of value you are manipulating. The shape of the control explains its role directly on the canvas.
A Gradient Mesh Is Not Another Tool
A Linear Gradient moves color along a single axis. A Gradient Mesh moves color across an entire surface. Traditional software often presents these as separate tools, separate modes, or separate subsystems. Compass treats the distinction as a property of the shape.
Start with a Rectangle, right-click it, and convert it into a Gradient Mesh. The rectangle becomes a live color surface without requiring the designer to select another dedicated tool.
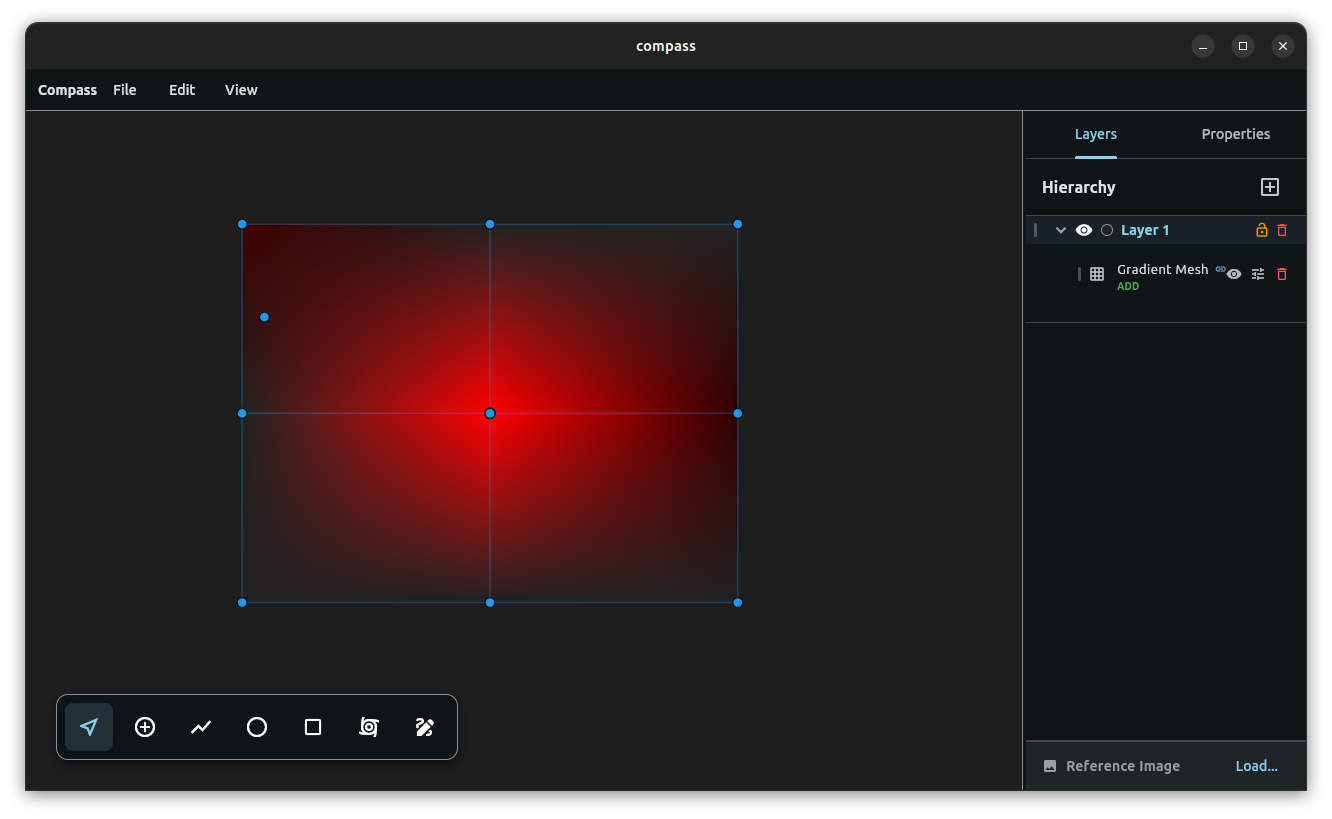
A Rectangle converted directly into an editable Gradient Mesh.
The mesh is built from Bicubic Coons Patches. Its nodes define the colors flowing across the surface, while its curved boundaries determine how those transitions bend through the form. The mathematics are sophisticated, but the interaction remains direct.
The mesh stays on the canvas. Select a node and change its color. Drag the node and the surrounding field follows. Hold A while dragging to adjust its tension and bow the surface around that point. The color field and the geometry remain part of the same construction rather than becoming separate editing systems.
Subdivide Where the Design Needs It
A mesh should not force the designer to decide its final complexity before beginning. Compass allows the structure to grow while the design is being developed.
Hold X over the surface and Compass previews a horizontal or vertical subdivision. Click to insert the new row or column directly into the mesh.
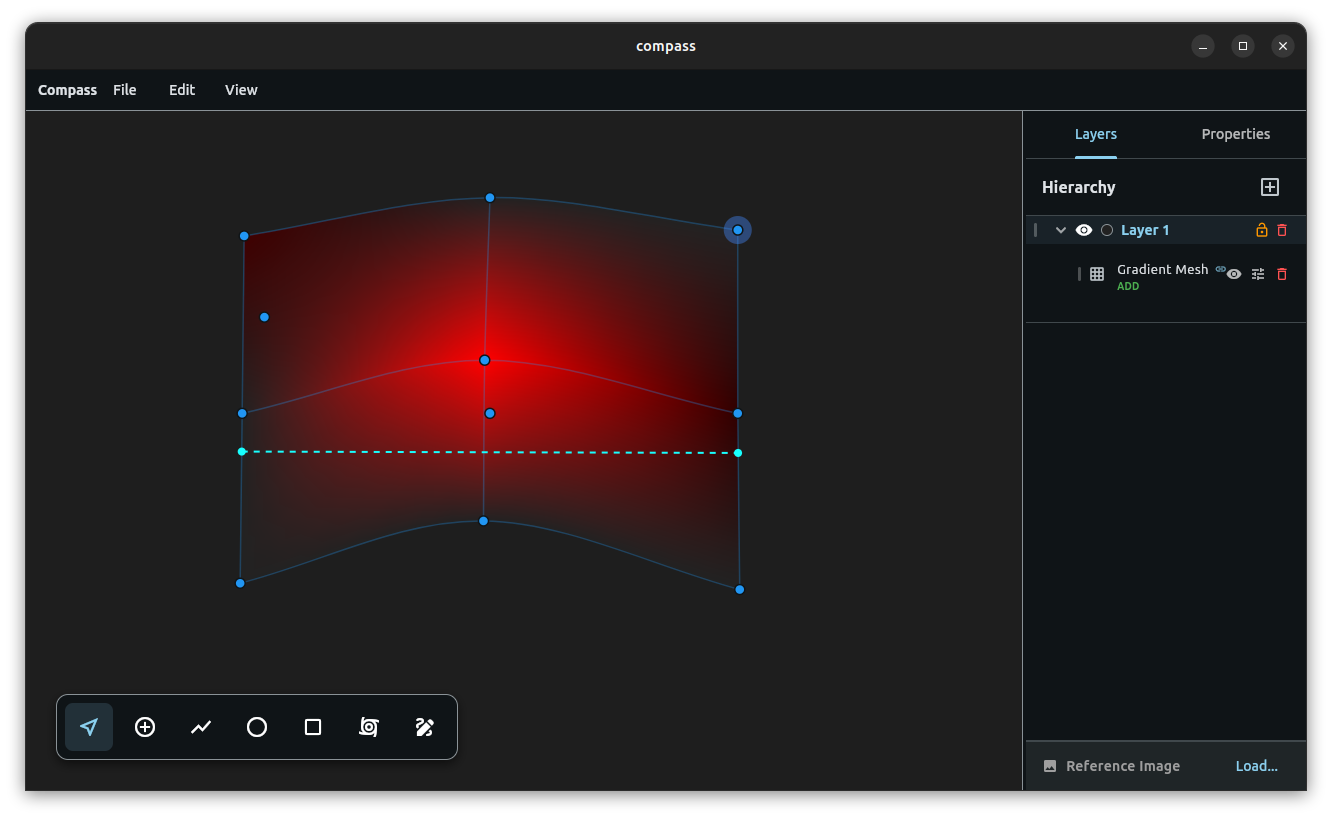
Using the X hotkey to add new rows or columns directly to the mesh.
The new topology follows the existing color field, preserving the current appearance rather than forcing the mesh to be rebuilt. The additional row or column simply introduces more places where the surface can be shaped and colored.
You do not leave the canvas, select another tool, or reconstruct the mesh through a dialog box. You point to the area that needs more control and add it. The operation exists in the same place as its result.
Shape the Mesh With an Intersection
A rectangular Gradient Mesh is a useful starting surface, but it is rarely the final shape a designer wants.
In Illustrator, the familiar workflow would be to place a path above the artwork and use it as a clipping mask. The mesh remains behind the mask while the path determines which portion of it stays visible.
Compass reaches the same visual result without introducing a separate masking system. Place a shape above the Gradient Mesh and set that shape to Intersect. Only the region shared by the shape and the mesh remains visible.
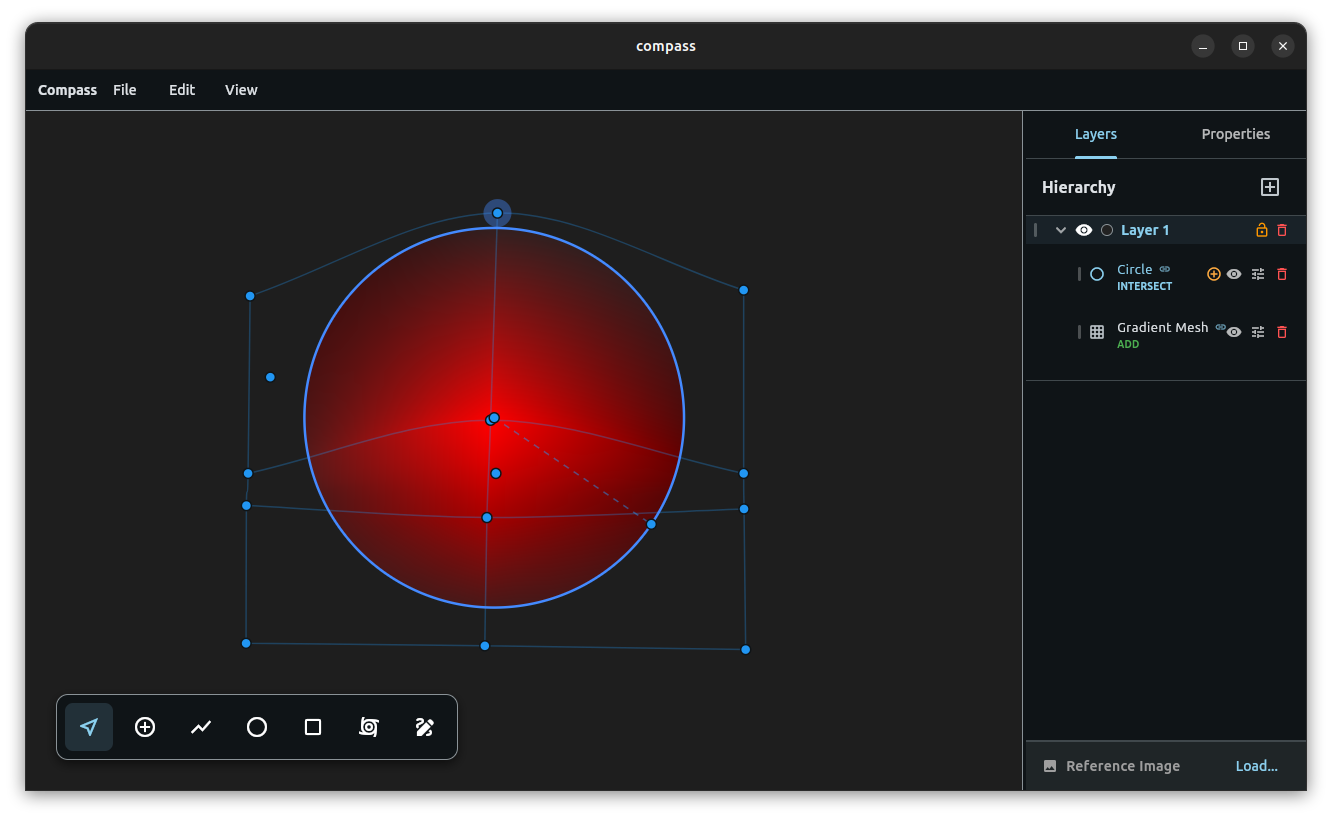
A live Intersect shape defining the visible boundary of a Gradient Mesh.
The intersecting shape becomes the live boundary of the color field. Move it and the visible region changes. Edit its points and the mesh is reshaped. Adjust the mesh beneath it and the colors continue flowing inside the intersected form.
Both structures remain independent and editable. Nothing is permanently clipped, expanded, or flattened. The workflow should still feel familiar to someone coming from Illustrator: create the gradient artwork, place a boundary over it, and use that boundary to reveal the desired region.
The underlying model, however, is different. A clipping mask is usually a special relationship maintained by a dedicated masking feature. Compass does not need another category for it. The visible result is simply the intersection of two live shapes. One provides the color field, the other provides the boundary, and the Boolean system resolves the relationship between them.
The Difference Between a Mask and a Relationship
A mask describes a presentation rule: show this artwork only inside this boundary. An intersection describes the geometry itself: the visible form is the region shared by these two objects.
The results may appear similar, but the second model belongs naturally inside Compass. The boundary is not a container wrapped around the mesh. It is another participant in the construction. It can be reordered, moved, constrained, reshaped, and combined with the same hierarchy as every other object.
The Gradient Mesh does not need to understand masks, and the Boolean engine does not need to understand gradients. The mesh provides color. The intersecting shape provides geometry. The engine only needs to resolve the relationship between them.
That is what allows the systems to remain independent without becoming isolated.
Tool Methods Instead of Tools
Compass still has methods. A gradient must be created, a mesh must be subdivided, a point must be colored, and an intersection must be established. But a method is not the same thing as a global tool mode.
A method is an action performed on the object already in front of you. Right-click a shape to apply a gradient. Drag the controls that appear. Convert a Rectangle into a mesh. Use a hotkey where additional structure is needed. Place another shape above it and use Intersect to define its visible form.
Each action begins with the design itself. The interface does not ask you to stop thinking about the object and begin thinking about which tool the cursor must become. That distinction is central to Compass.
Software Does Not Need to Imitate a Toolbox
The physical-tool metaphor has shaped creative software for decades. It gave early graphical interfaces clarity, but it also made isolated functions feel inevitable.
Why is a gradient a tool? Why is rotation a tool? Why is corner editing a tool? Why is masking an entirely separate system from the geometry it reveals?
Why should the designer repeatedly declare what kind of operation the cursor is allowed to perform when the selected object and the gesture already provide that context?
A point can be dragged. A gradient endpoint can be dragged. A mesh node can be dragged. An intersecting boundary can be moved. The object already tells the software what the interaction means. The additional mode often contributes nothing except interruption.
The Milestone
Gradient Meshes and on-screen Linear Gradients bring color into Compass, but more importantly, they demonstrate that sophisticated design functions do not need to become additional icons in a toolbar.
A shape can become a Linear Gradient through its own context. A Rectangle can become a Gradient Mesh through its own context. The controls can appear directly on the artwork. Hotkeys can introduce additional structure exactly where it is needed. A live Intersect shape can define the visible boundary of the mesh without introducing a separate mask mode or flattening the result.
Nothing requires a dedicated Gradient Tool because the gradient was never separate from the shape. Nothing requires a dedicated Mask Tool because the boundary is already geometry.
That is the milestone.
Compass is not recreating Illustrator one missing tool at a time. It is testing which of those tools needed to exist in the first place.
You can find the repository and download the latest release here:
https://github.com/nathanfx330/compass
— Nathaniel Westveer